Electrodes : Placement and Preparation
Amy Bean
Sunday, November 1st, 2020

This month’s Blog post will give you some handy tips and advice with using the electrodes for your electrical stimulation device. Our SaeboStim Pro is used in the electrode placement tutorial videos at the bottom of this page, but the principles apply to any electrical stimulation device. Scroll to the bottom of the page for guidance with our SaeboStim One
Do check back on this blog as the video library will be added to over time. You can also Subscribe to our Saebo UK YouTube channel to keep up to date with our latest videos
Skin Preparation
- Thoroughly clean the skin of any oils, creams, dirt, dead skin etc.
- Use water to clean the area and ensure skin is fully dry before placing the electrodes on the skin.
- If hairy, use beard trimmers or scissors to clip the hair. Do not shave the area as this cause tiny micro abrasions which will make the stimulation uncomfortable.
- Ensure there are no wrinkles on the electrodes when placed on the skin
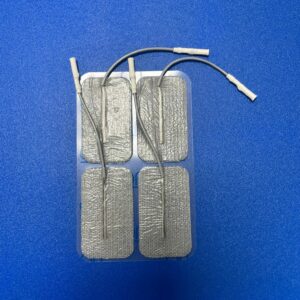
Electrode Size
Any muscle lying under an electrode will be stimulated. Therefore select the correct size to ensure only the muscles you want to target are stimulated.
Standard sizes are:
3.2cm round Consider these smaller electrodes for for smaller muscles e.g. around the thumb, or with very small children.
5cm round Most commonly used size.
3.3cm/5.3cm rectangular The rectangular shape can provide more even distribution of stimulation than round, therefore being more comfortable.
5cm by 9cm rectangular Consider these large rectangle electrodes for larger muscles such as hamstrings and quadriceps
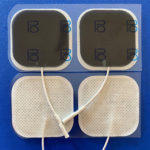
If you have sensitive skin you may want to consider a hypoallergenic option. These electrodes have a slightly thick gel layer which makes the stimulation felt by the user more comfortable. The hydrogel is also specially formulated to sensitive skin. The added benefit of the thicker gel layer is that they typically last longer before being needed to be replaced. Therefore although they are often slightly more expensive than standard electrodes, they may be more economical for longer term users.
At Saebo UK we have hypoallergenic electrodes available in 2 sizes :

Looking after your electrodes
- The key to longevity of electrodes is slowing down the drying out of them when not in use.
- When removed from the skin, slightly moisten the sticky side of the electrode (a damp finger tip works well).
- Place the clear backing back on the sticky side after moistening.
- Place the electrodes back in their bag for storing.
- Typically standard electrodes will last about 30 applications . The unique gel electrodes for the SaeboStim One will last about 10-12 uses.
Electrode Placement – Most commonly used
Click on the videos below to watch our Clinical Specialist talk through various set ups.
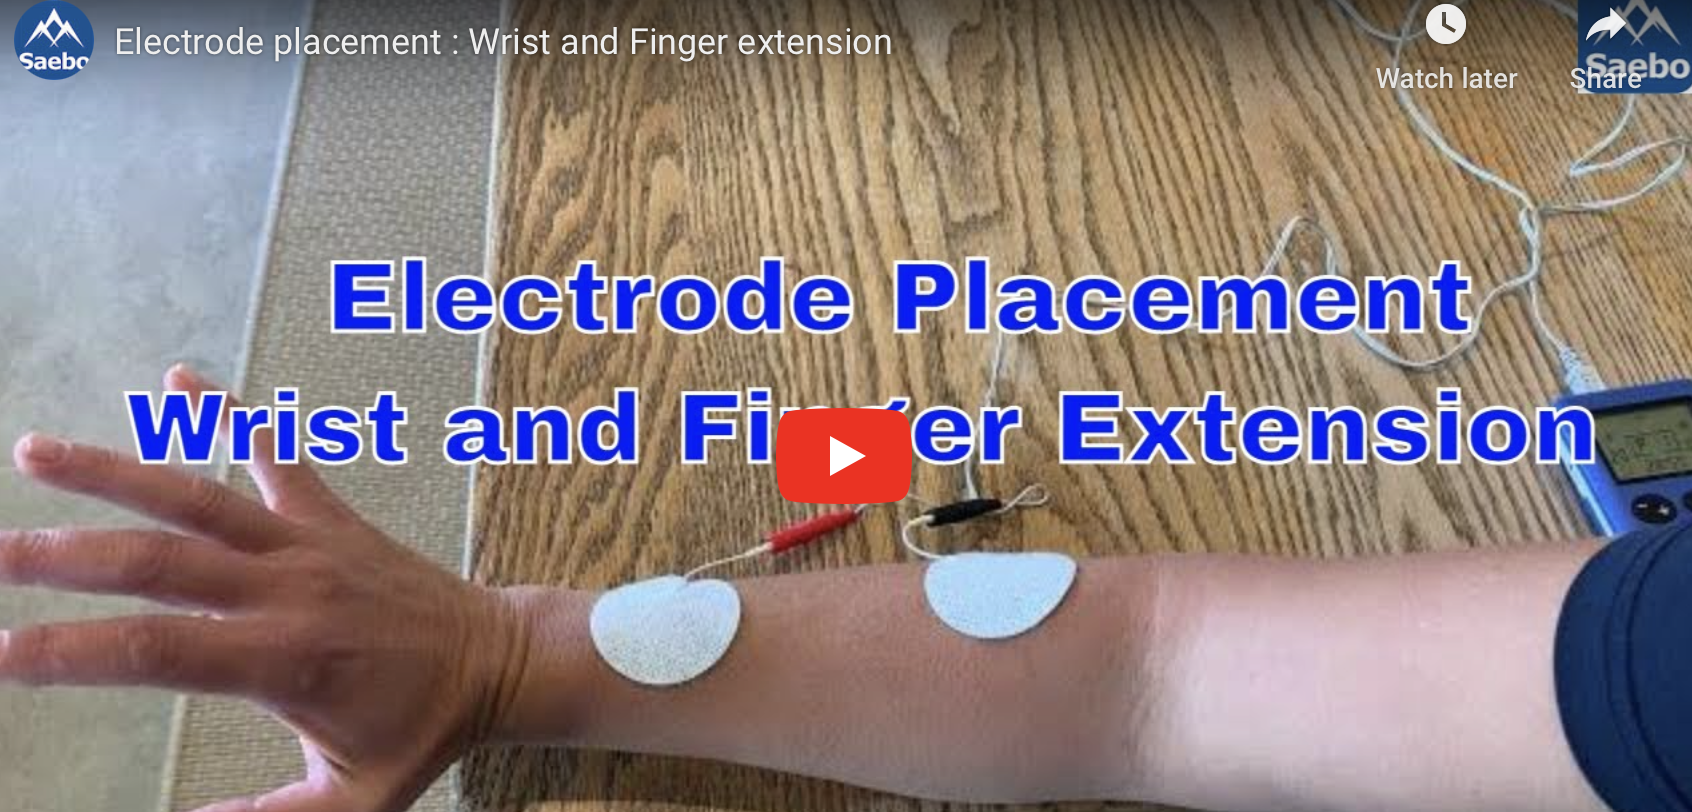
Wrist and Finger extension
1 lead with 2 electrodes. Place 1 electrode just up from the wrist on the finger extensor motor point and place the 2nd electrode further up the forearm on the tendinous part.
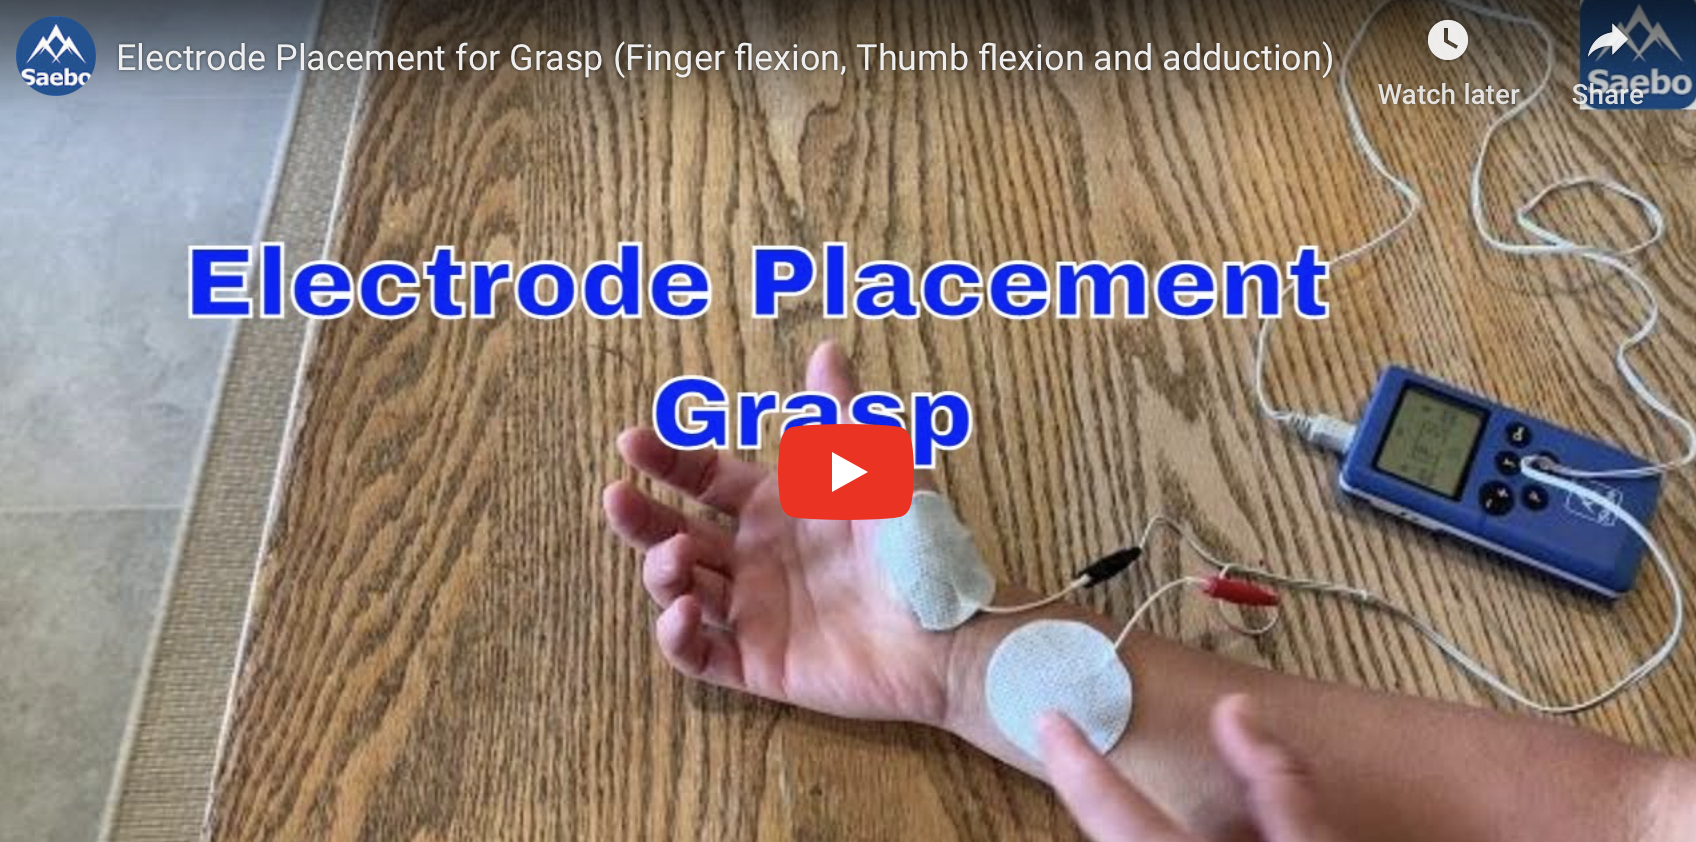
Grasp – Finger flexion with thumb flexion and adduction
1 lead with 2 electrodes. Place 1 electrode near the wrist on the underside of the forearm and the 2nd electrode over the fleshy part at the base of the thumb. You may need to trim the edges of the 2nd electrode as illustrated in the video.
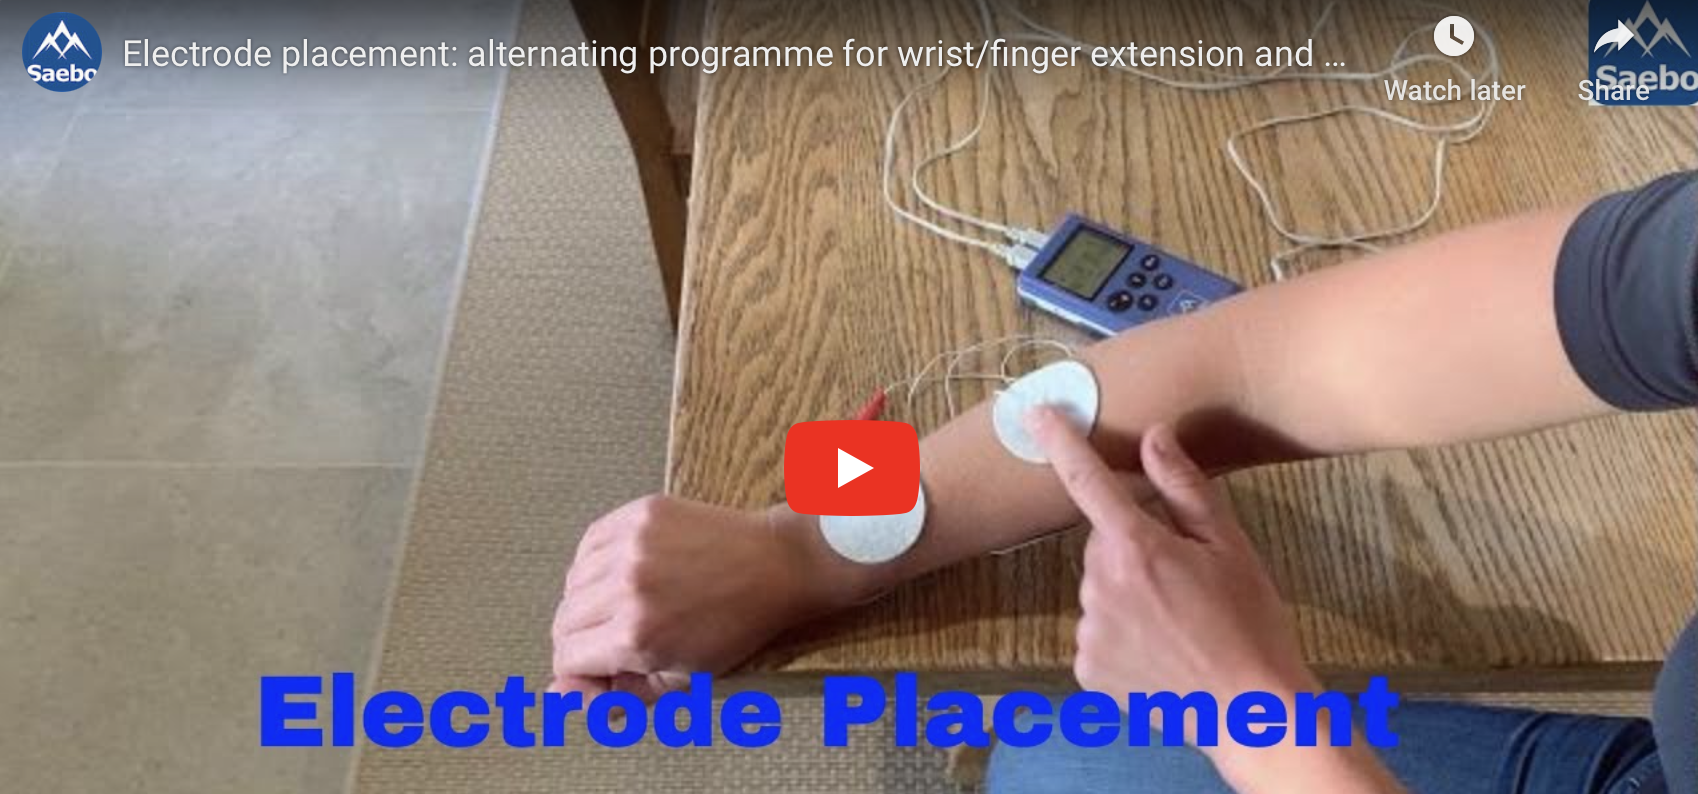
Alternating between Wrist/Finger extension and Wrist/Finger flexion
2 leads. First lead is the same electrode placement for wrist and finger extension as described previously on this post. The second lead has one electrode placed near near the wrist on the underside of the forearm and the 2nd electrode about midway up the underside of the forearm.
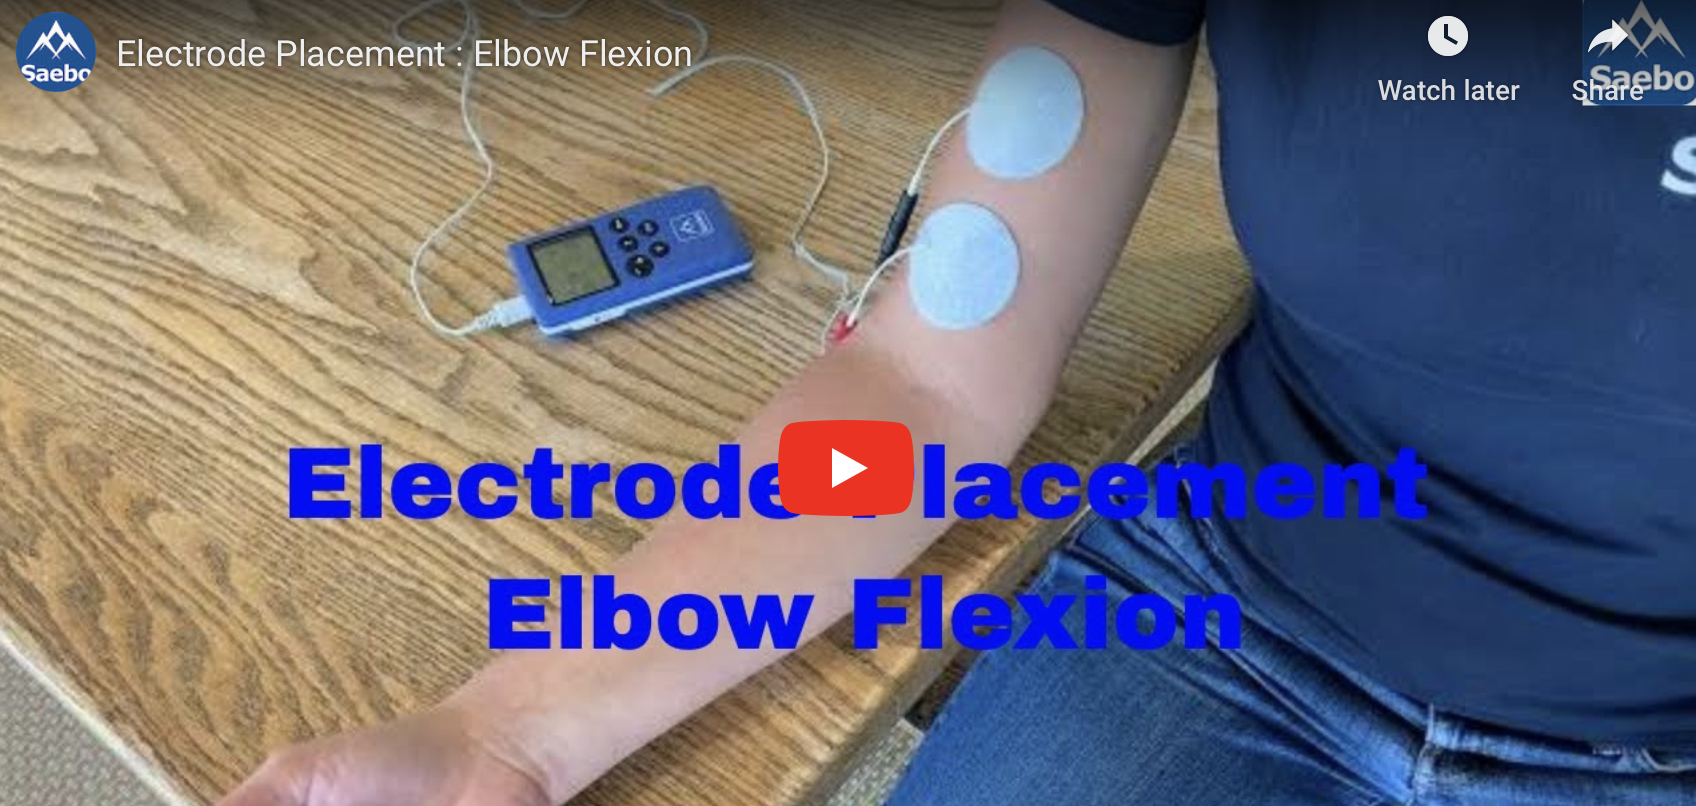
Elbow flexion
1 lead, 2 electrodes. Both electrodes placed mid upper arm on the biceps muscle. Ensure they have a minimum of 2 fingers space between them.

Elbow extension
1 lead, 2 electrodes. Both electrodes placed on the back of the upper arm on the triceps muscle. Ensure they have a minimum of 2 fingers space between them.
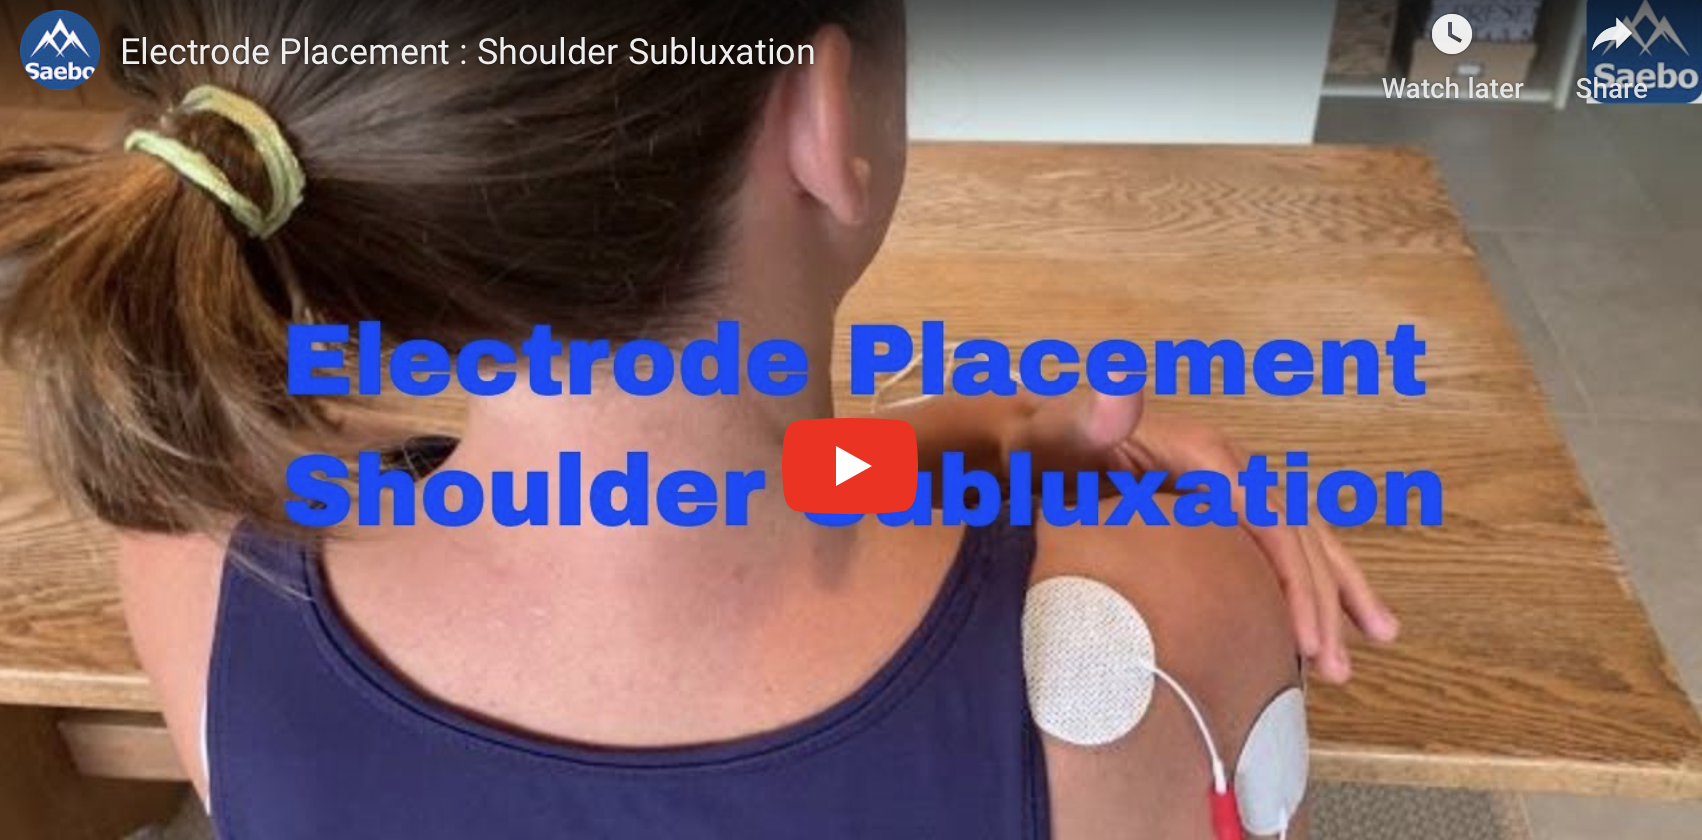
Shoulder Subluxation
Two options available
Option 1 is with 1 lead and 2 electrodes – 1 electrode is placed on supraspinatus (the fleshy part just up from the shoulder blade) and 1 electrode on posterior deltoid (the back of the upper arm, just beneath the subluxation gap).
Option 2 is with 2 leads. Set up lead 1 as per option 1 above. On lead 2 place 1 electrode on the middle of the upper arm and the 2nd electrode on the front of the upper arm; both positioned just beneath the subluxation gap.
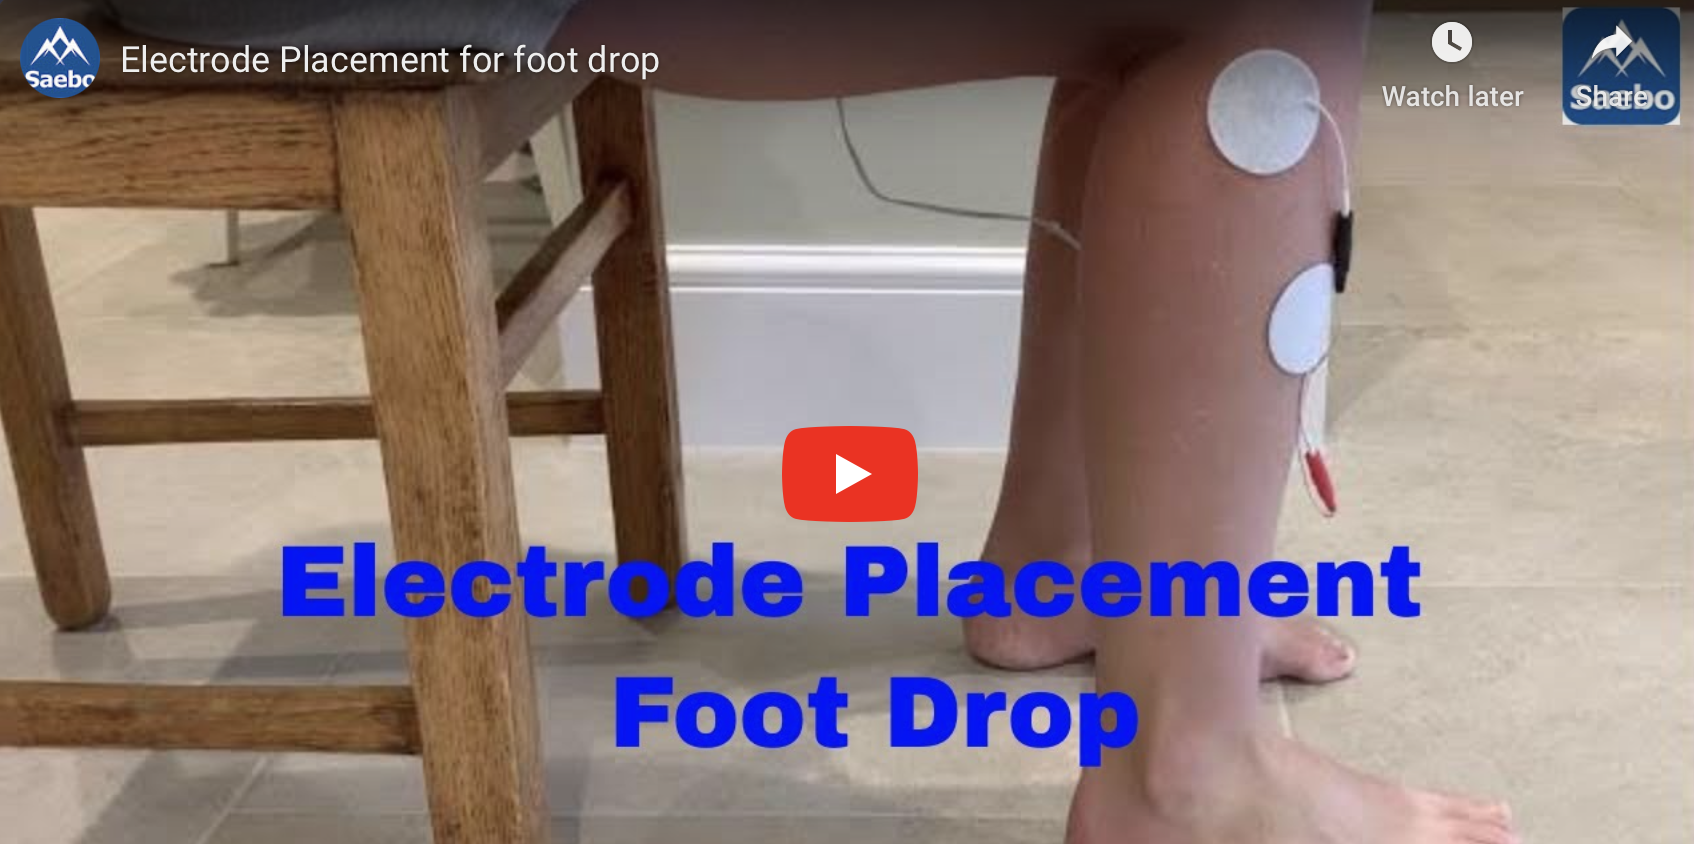
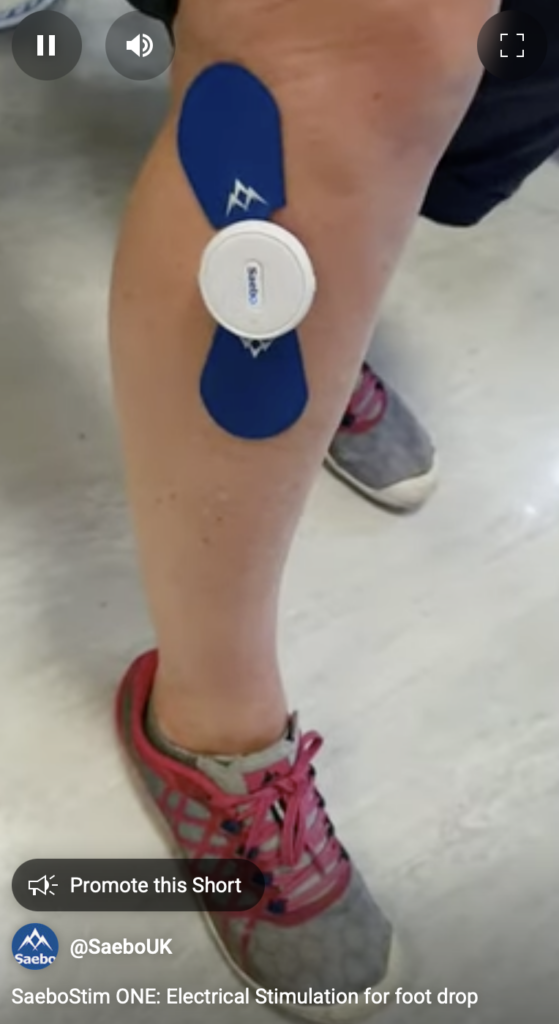
Foot Drop
1 lead with 2 electrodes. 1 electrode mid way down the shin on the fleshy part, just off the tibia (this is the bone running vertically down the shin). 2nd electrode is placed with its top right corner on the head of the fibula. To find this bone, run your fingers up from your ankle on the outside of your leg until you hit a bony prominence which is the head of the fibula. Our Clinical Specialist talks through how to make small adjustments to ensure the ankle is lifted with some eversion (ankle pointing outwards).
Forearm Supination
1 lead with 2 electrodes. 1 small electrode (1.25 inch round) just below the elbow joint.
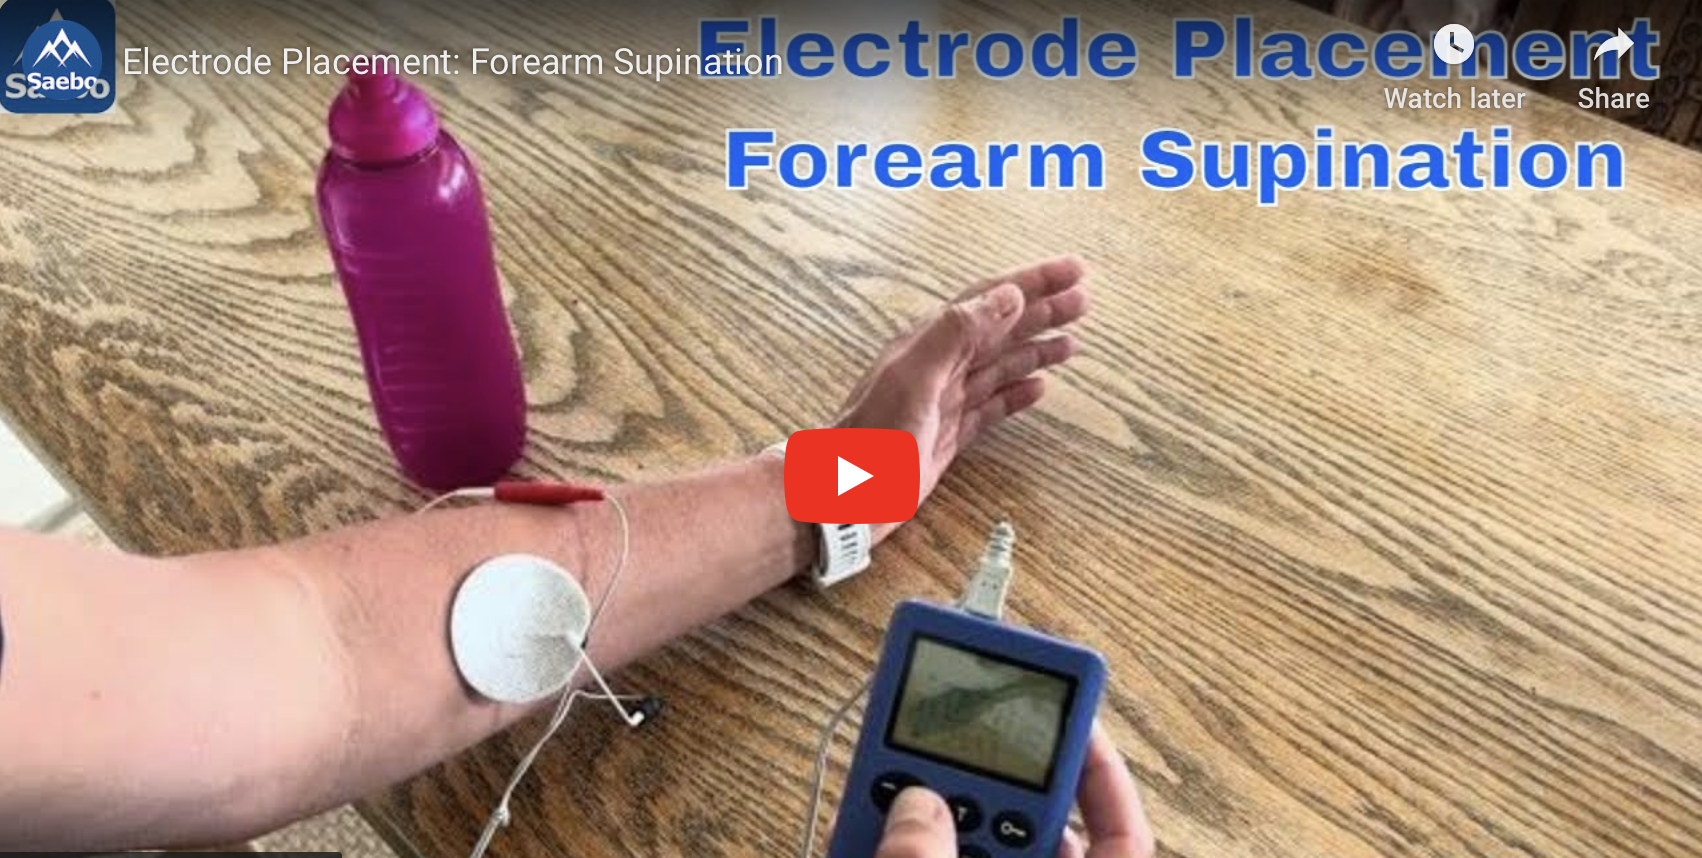
Run your finger down from your elbow joint until you hit the fleshy part, place your electrode on this fleshy part. 2nd electrode (2 inch und) placed on the flexor surface of your forearm near to your elbow. As you turn the intensity of the stimulation up you will initially get forearm supination, followed by wrist extension.
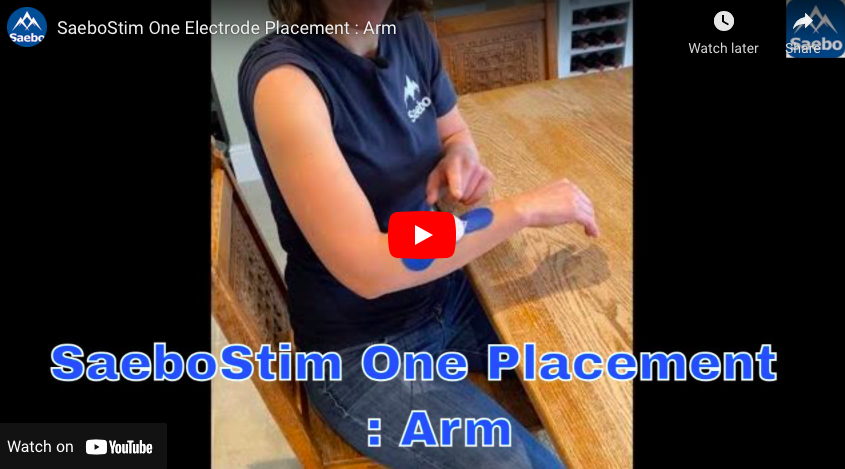
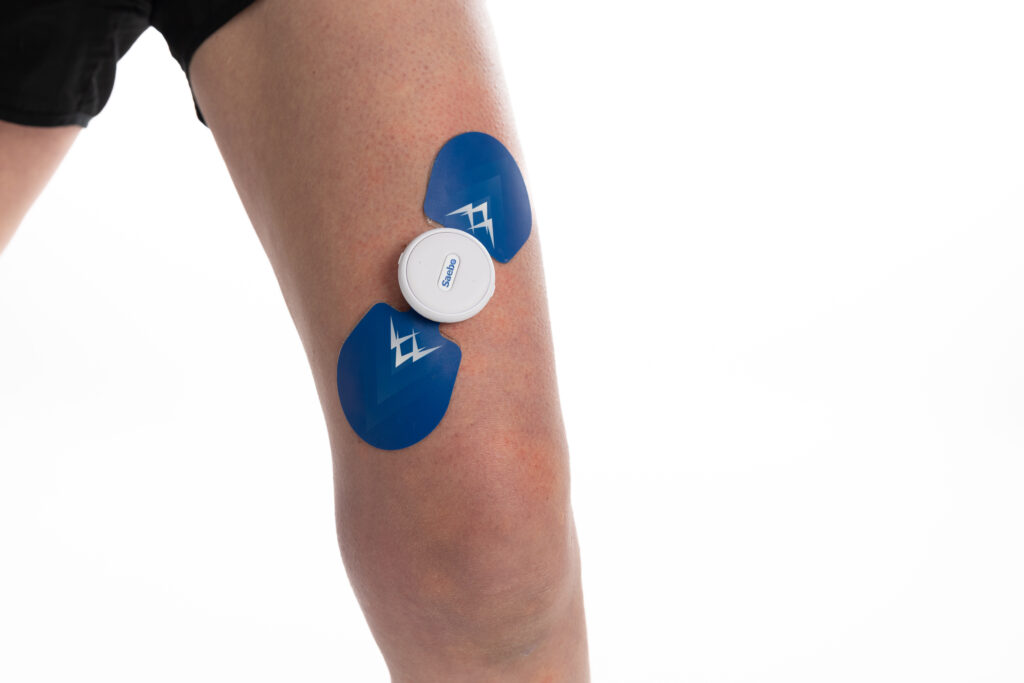
SaeboStim One Placement guide
This video shows you 3 commonly used locations on the arm with our SaeboStim One , but this device can be positioned over any muscle it can be positioned on.
And the SaeboStim One isn’t just for the arm, you can also use it for ankle movement when foot drop is present
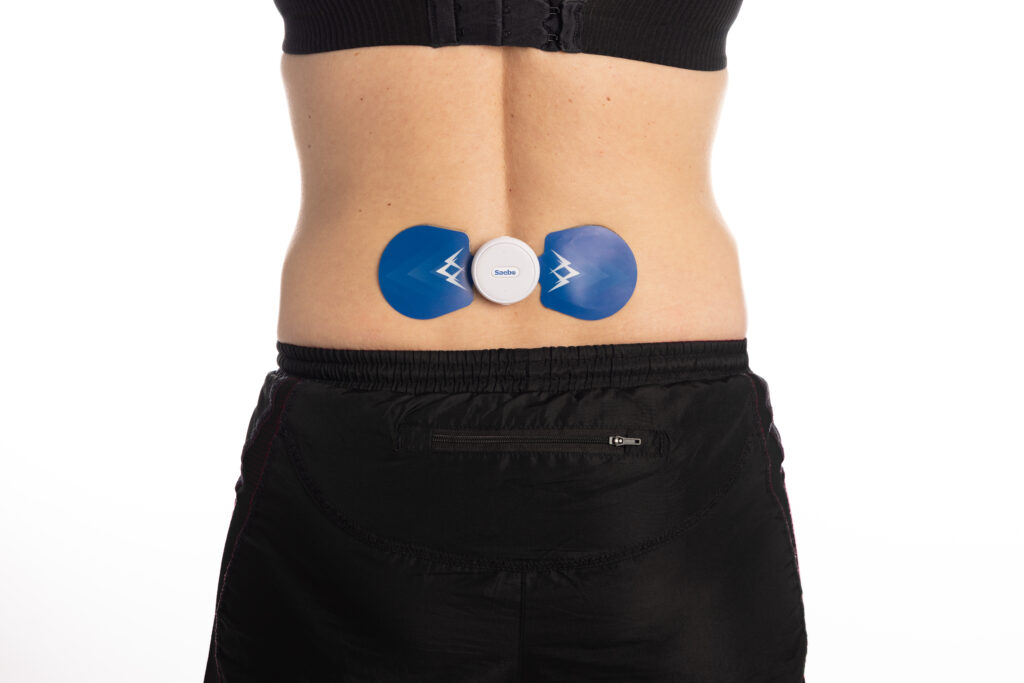
And you can use on your thigh or lower back to build muscle strength.
At Saebo we have a team of clinicians you can contact if you have additional questions not covered by the above guidance .